


Creating natural-looking curls at home can sometimes feel frustrating. You spend time styling your hair only to see the curls fall flat, become frizzy, or lose their shape within a few hours. The truth is that achieving soft, long-lasting curls isn’t just about technique—it also depends heavily on choosing the right curling tool.
With the right curling wand and a few simple styling steps, you can create smooth, shiny curls that hold their shape while still looking effortless and natural. Understanding your hair type, selecting the proper temperature, and using a wand designed to prevent tangling can make a significant difference in your results.
Why Natural Curls Can Be Difficult to Achieve
Different hair types react differently to heat styling tools, which is one reason curling results can vary so much from person to person.
Fine hair, for example, tends to struggle with holding curls because the strands are lightweight and may lose shape quickly. Thick or coarse hair, on the other hand, often requires higher heat levels to form curls that stay in place throughout the day.
Hair length also plays a role. Longer hair may wrap around the barrel unevenly, while shorter styles may require smaller sections and more precise styling.
Another common issue is frizz. When hair cuticles are rough or damaged, curls can appear dull instead of glossy. Curling tools that include technologies like negative ions or ceramic coatings can help smooth the hair surface and reduce frizz during styling.
What Makes a Good Curling Wand for Natural Curls
A quality curling wand should do more than simply heat up. The best tools offer features that help protect hair while producing smooth, defined curls.
Some important features to look for include:
Adjustable heat settings
Different hair types require different temperatures. Fine hair typically needs lower heat, while thicker hair may require higher temperatures to maintain curl shape.
Anti-tangle design
Wands designed to allow hair to wrap smoothly around the barrel help prevent snagging and uneven curls.
Frizz-reducing technology
Features such as negative ion technology or ceramic coatings help create smoother, shinier curls.
Extended barrels
Longer barrels are especially useful for people with long or thick hair because they provide more space to wrap the hair evenly.
These features make styling easier and reduce the risk of damage from excessive heat exposure.
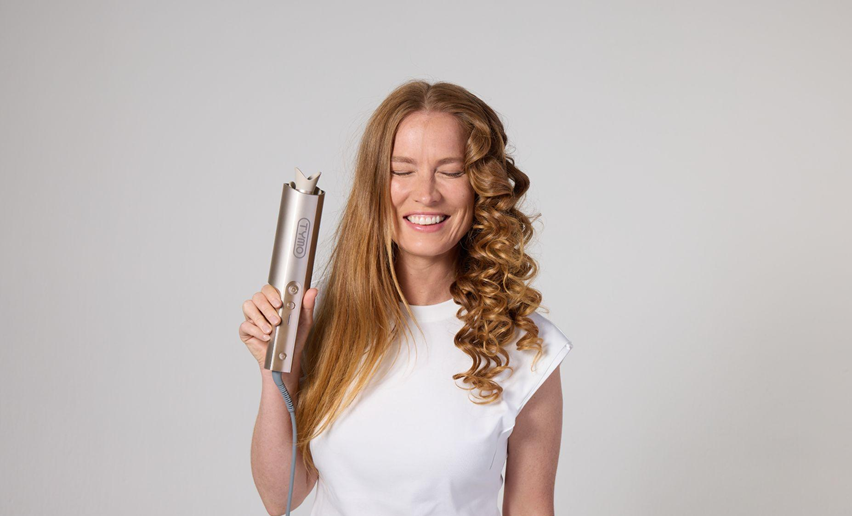
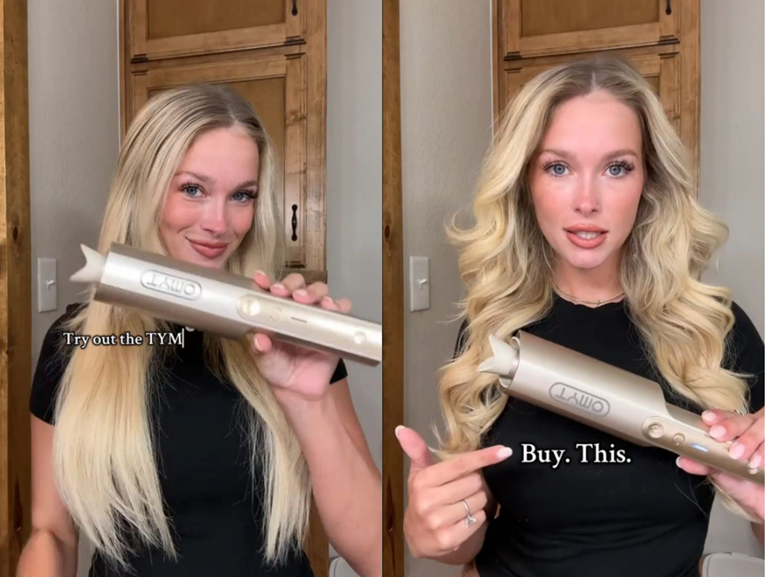
A Tool Designed for Smooth, Natural Curls
One example of a curling wand designed with these features is the TYMO CURLPRO PLUS. This styling tool includes adjustable temperature settings, anti-tangling technology, and shine-enhancing materials that help create defined curls with minimal frizz.
The wand also includes an extended barrel that works well for longer hair and supports a variety of curl styles—from loose waves to more defined ringlets.
Another helpful feature is dual-voltage compatibility, making the tool suitable for travel. This means users can maintain their styling routine even when visiting countries with different electrical systems.
Step-by-Step Guide to Creating Natural Curls
Using the right curling wand is important, but proper technique also plays a key role in achieving natural curls that last.
1. Prepare Your Hair
Start with clean, dry, and detangled hair. Applying a heat protectant spray is essential to reduce potential damage from high temperatures.
Choose the temperature setting based on your hair type:
- Low heat for fine or damaged hair
- Medium heat for normal hair
- High heat for thick or coarse hair
This ensures that curls form properly without exposing your hair to unnecessary heat.
2. Section Your Hair
Dividing your hair into sections helps ensure even styling. Most stylists recommend splitting hair into two to four horizontal layers and clipping each section out of the way.
Working with smaller sections—about one inch wide—allows the heat to distribute evenly and prevents curls from forming unevenly.
3. Wrap the Hair Around the Wand
Hold the curling wand vertically if you want soft, natural waves. For fuller curls with more volume, hold the wand horizontally.
Wrap the hair smoothly around the barrel without overlapping too much. Allow the heat to shape the curl for several seconds before releasing.
4. Let the Curls Cool
One of the most overlooked steps in curling hair is allowing the curls to cool before touching them. When hair cools, the shape sets and becomes more durable.
You can hold the curl in your palm briefly or clip it in place for a few seconds before releasing it.
5. Finish and Define
Once all curls are complete and cooled, gently separate them using your fingers or a wide-tooth comb.
Finish the style with a lightweight hairspray or shine serum to keep curls soft while adding a healthy glow.
Key Benefits of Modern Curling Wands
Today’s curling tools are designed to make styling easier and safer. Features like ceramic barrels, ion technology, and adjustable heat controls help reduce damage while delivering salon-quality results.
For example, some ceramic-coated curling wands distribute heat evenly across the hair, creating smoother curls and helping them last longer throughout the day.
Other models include automatic shut-off functions or digital temperature displays, adding both convenience and safety to everyday styling routines.
Final Thoughts
Natural curls don’t have to be difficult to achieve. With the right curling wand and proper styling techniques, it’s possible to create soft, bouncy curls that hold their shape while still looking relaxed and effortless.
By choosing tools with adjustable heat settings, anti-tangle designs, and frizz-reducing technology, you can transform your daily hair routine and achieve polished curls without spending hours styling.
Whether you prefer loose beach waves or more defined curls, the key is finding a curling wand that works with your hair type—and using it the right way.

